
Day 3: Wonderful WonderBoard
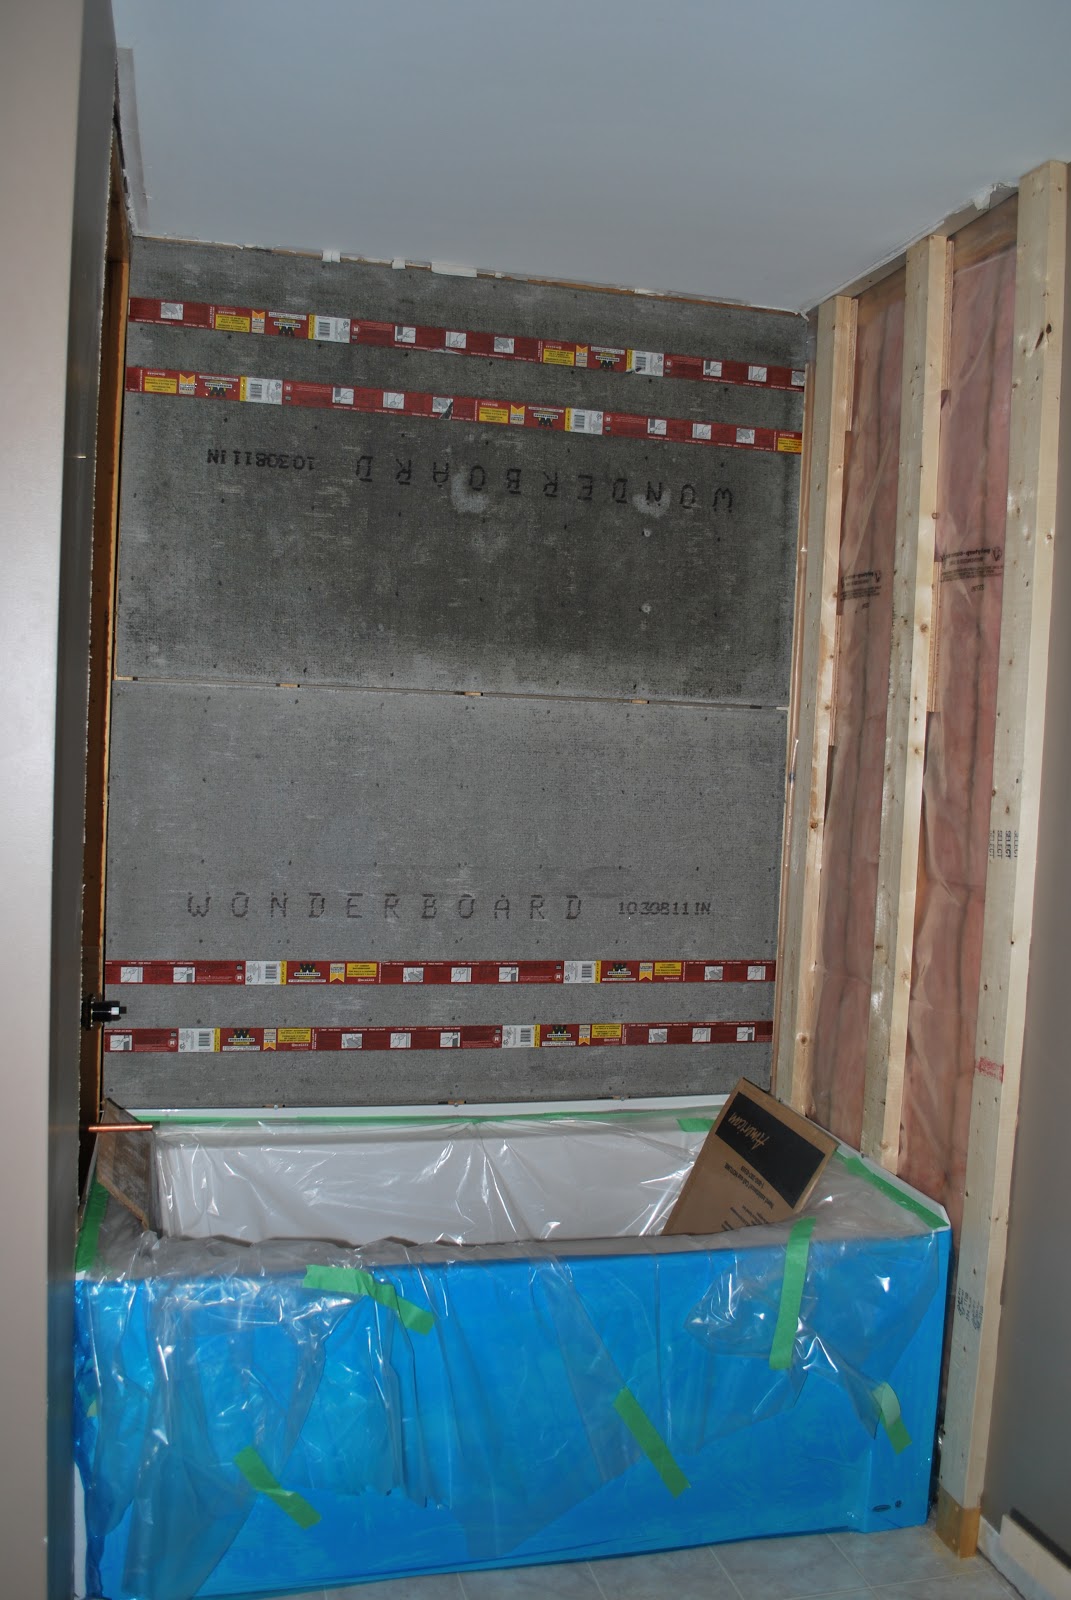
After dealing with a giant leak that knocked the wind out of our sales (but did cause a laugh or two along the way) the night before, we started Day Three quite cautiously. Mainly, by bringing out the plastic and the cardboard to protect the tub from all the nastiness that was bound to occur.

The first step was getting the cement board (aka WonderBoard) up and attached to the studs. We'd been storing these heavy sheets of cement-like material in the garage and we wanted to cut the sheets to size in there as well so that we could contain some of the mess. So Lucas took the measurements, I checked them, he checked them again and then we would go to the garage, score and cut the board and bring it upstairs to attach. And without fail, they always needed to be trimmed by basically breaking off the little bits of cement that were too long.
Lucas then got down to screwing these heavy babies into place. Too bad that the drill bits he was using kept stripping though. That honestly caused more frustration than the bath leak did the night before. So off to Home Depot I went to pick up some better quality drill bits that were meant for the impact drill he was using.

But, let me tell you, this was one of the best steps of the whole process. We went from bare 2x4s and copper & ABS pipe to covered walls. It was very gratifying!
Once all the Wonderboard was up, Lucas sealed the seams with the mortar that we would be using for the tile to ensure that everything was water-tight.

Then we went to work on repairing some of the walls in the bathroom that needed to be changed to accommodate the bigger, more luxurious tub. Lucas was quite nervous about this step, as he needed to fix/create both and outside and inside corner but I think he did an awesome job!

After letting the mortar dry on the WonderBoard seams (and making a jaunt to the store for some much needed groceries and Home Depot again because the old level in the picture just wasn't trustworthy for making a level line for the tiles), we started the tiling job.

We used a mortar called OmniGrip and its was quite easy to work with. After messing up the first few tiles and re-doing them, we got the hang of the process rather quickly I think.

A couple rows up, we placed some corner shelves and a couple rows after that, we put in the glass/marble mosaic that we chose to add some detail to the wall of tile.

While I placed most of the tiles on the wall, I needed Lucas to help to help me with the tall ones since I couldn't reach :)


By the end of Day Three, we had the back wall completely tiled but we ended up not being able to continue because we were running out of mortar.
See when we bought all of the tiling supplies, we spoke to a Home Depot associate about what the best materials were and she recommended the OmniGrip because it would stand up best to moisture. We asked how much we would need for the square footage we were working with and she checked the label, told us that one bucket would do 40 to 60 square feet. Since we knew we had 66 square feet of tiling, we picked up 2 buckets and continued on our way. Only thing is, at the end of Day 3, we had done about 32 square feet and had used 1.75 buckets of the mortar. Turns out that the Home Depot associate misread the label and actually, one bucket only covers 15 square feet.
Day 4: Tiling My Walls
So, back to Home Depot I went first thing in the morning. Luckily the associate was working and definitely helped us out financially considering her mistake. I picked up the extra mortar that we needed and got some paint and went home to get the rest of the tiling done.

She that smiley face? That's cause I really like driving to Home Depot (... not).

It wasn't long before we were "almost" finished though. We slumped ourselves on the sofa for the rest of the evening because we were so exhausted. But, we were excited for the next day (Dec 31) because we were going to paint, install a new fan and grout. The end was definitely in sight!
Day 5: The Great Grout Debacle
We had to let the tiles set overnight, while still propped up on horizontal 2x4s and were certain not to slide down the walls, so bright and early the next morning we finished the last row of tiles.


Looking good!

After finishing the tiles, we needed to let everything dry for several hours so we headed out to Home Depot to get everything we needed to beef up the fan in the bathroom. No point in replacing a bunch of things and painting if we were just going to muddy it up again with poor air circulation right?
So the electrical engineer got to work and lets just say, the saying "its got to get worse before it can get better" was running through my head an awful lot!


Yikes!
By the time the fan was ready to go and I'd gotten all my painting supplies out, it was time for grout.
Before getting started too much though I called my Dad for any last minute instructions. His only warning was to "... not scrub too hard or you'll risk taking the grout out." So I told Lucas the warning and he wiped lightly and just kept going around the shower, taking more and more grout off of the tiles each time he made his way around.
Turns out that was a bad idea. After 3 hours, the tiles still looked like the picture below and everything was starting to harden making it difficult to get the tiles even close to clean.


See all that grout on my gorgeous glass tiles? Yeah, not cool.
By 12:02am on Jan 1 we had finished though.
In the first 4 hours, I completed the painting of the room, Lucas has put the grout on and was making slow progress to removing it. 4 hours later (yep, that's a total of 8 hours for grouting), after much frustration and maybe a few cross words, we'd worked together scraping and washing the grout off with paint stir-sticks, rags, plastic putty knives and toothbrushes. Definitely not the must fun way to spend New Years Eve, but trust me when I say that the end product was worth it!
Stay tuned for tomorrow when I share pictures of the finished bath/shower, the new paint colour and our plans for re-facing the cabinetry in the bathroom :)


3 comments:
The tile is AMAZING! Love the choice of larger tile and glass tile and I really like the combo. It looks lovely.
That indeed looks like lots of work. Good job! I'm excited for the finished product. What a productive break you had.
It really looks so nice! Can't wait to see the finished product!
Post a Comment